 This post is part of the In Microsoft Dynamics 365 Business Central (Inventory and Warehouse Management), how do I… series and of the wider In Microsoft Dynamics 365 Business Central, how do I… series which I am posting as I familiarise myself with Microsoft Dynamics 365 Business Central.
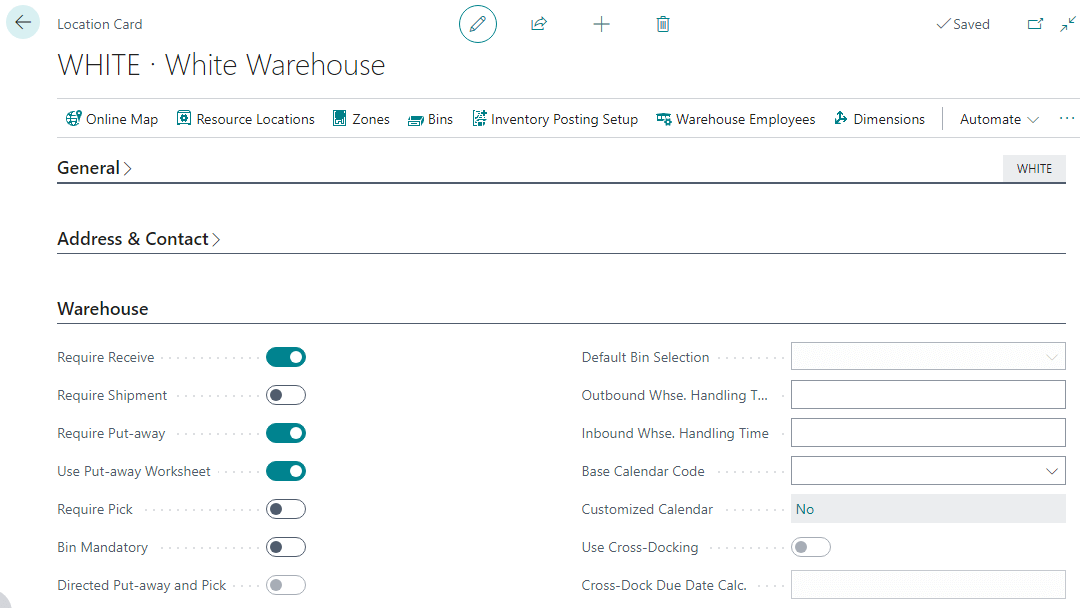
The top level of the advanced warehousing functionality, is to use the put-away worksheet, which requires both the require warehouse receipt and require warehouse put-away to be enabled. With the other settings, there are three toggles on the location card which need to be enabled to use the put-away worksheet. When you create a location, on the Warehouse fasttab, you need to toggle the Require Receive, Require Put-away and Use Put-away Worksheet options to the on position (the third option is disabled unless the first two are toggled on):
Receiving goods in this way, allows you to receive and plan the put-aways for multiple orders at the same time, instead of one-by-one. In the next couple of articles in this series, I’ll create a put-away worksheet template and then step through the process of using the put-away worksheet at the new WHITE location.
In Microsoft Dynamics 365 Business Central, how do I…
In Microsoft Dynamics 365 Business Central (Inventory and Warehouse Management), how do I…
What should we write about next?
If there is a topic which fits the typical ones of this site, which you would like to see me write about, please use the form, below, to submit your idea.


1 thought on “In Microsoft Dynamics 365 Business Central (Inventory and Warehouse Management), how do I… Configure Warehouse Put-aways to Use the Put-away Worksheet in Advanced Warehousing”