 This post is part of the In Microsoft Dynamics 365 Business Central (Inventory and Warehouse Management), how do I… series and of the wider In Microsoft Dynamics 365 Business Central, how do I… series which I am posting as I familiarise myself with Microsoft Dynamics 365 Business Central.
In the last article in this series, I covered how to configure the bin contents and mentioned that when you do that process you can set a default bin for each item; if you don’t set a default bin for an item, the first time the item is put-away, the default bin will be set to the selected bin.
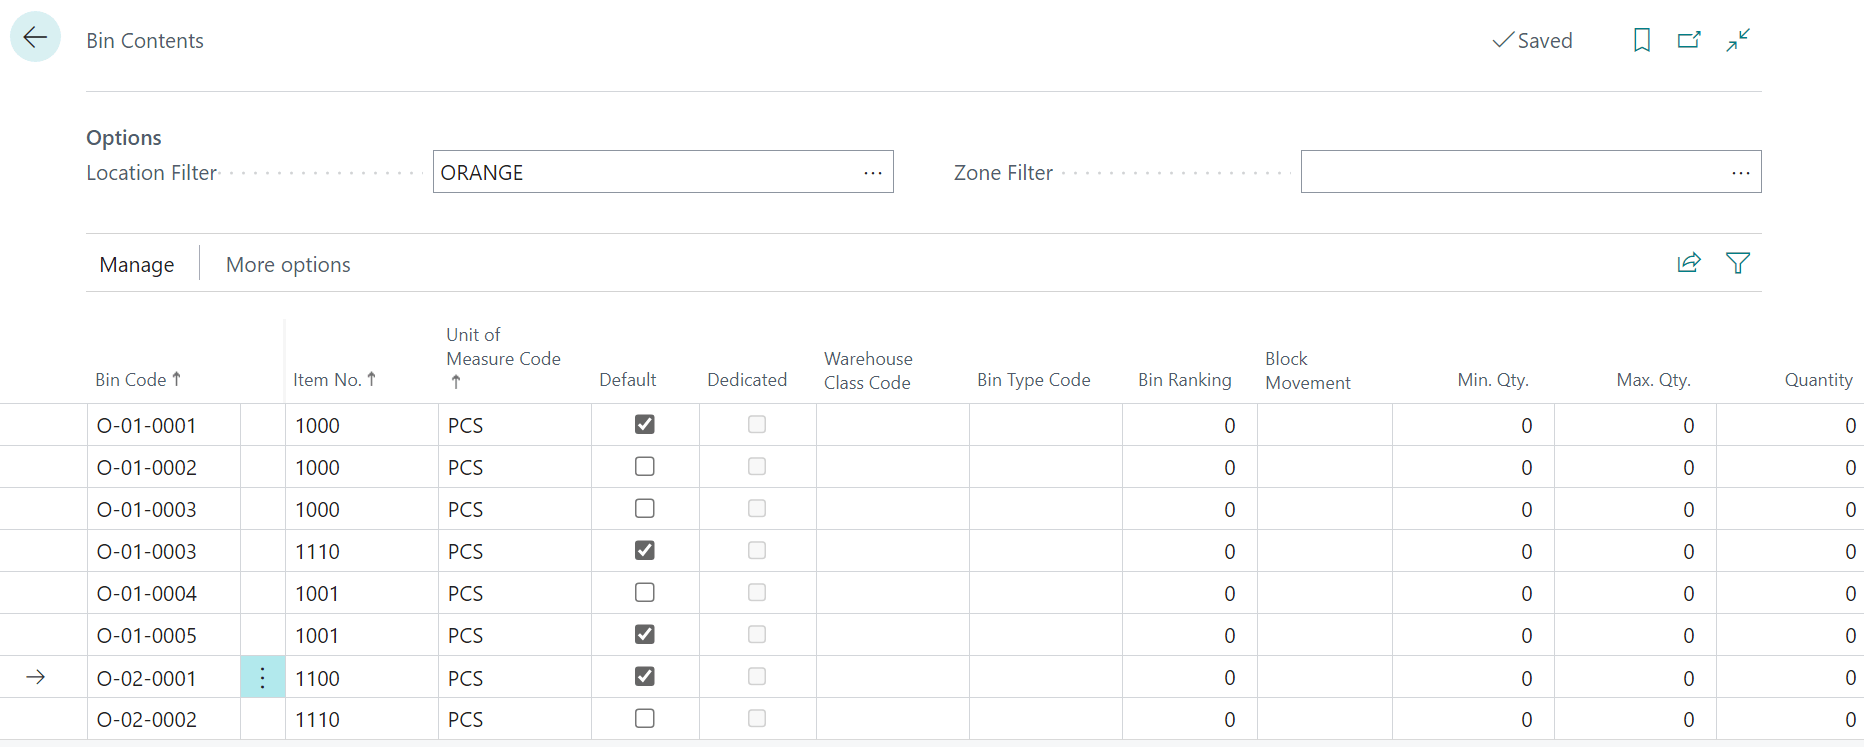
If you want to pre-set or change the default site, this can be done through the Bin Contents window, which you can find through the search function.
You can set a Location Filter at the top of the page; the Default column will be marked for the current default for an item. To change the default, you will first need to unmark the existing default and mark the new one:
 Default Bin for an Item
If a default bin for items is not set, then when the first transaction is entered for an item, the bin used on that transaction will be set as the default.
In Microsoft Dynamics 365 Business Central, how do I…
What should we write about next?
If there is a topic which fits the typical ones of this site, which you would like to see me write about, please use the form, below, to submit your idea.


