Using Pi-hole On A Raspberry Pi: Connecting With SSH

Raspberry PiThis post is part of the series on using the Pi-hole; this series is a sub-series of the Adventures with a Raspberry Pi.

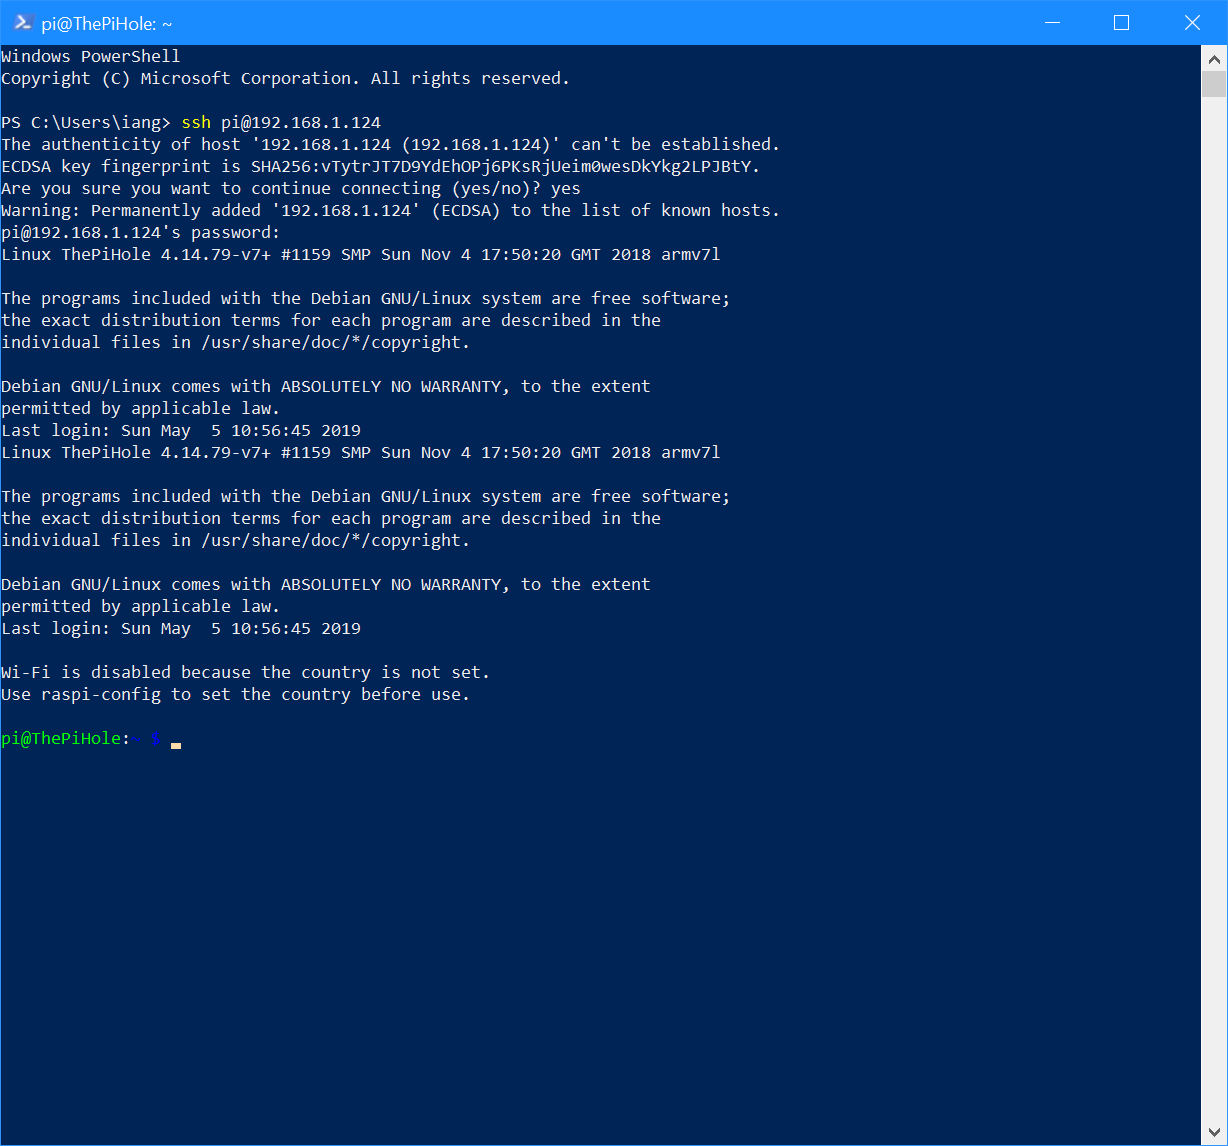
With the Raspberry Pi configured to allow remote access using SSH, we can connect to it using an SSH on any other machine. Windows 10 has the SSH client enabled by default from the April 2018 Update (Windows version 1803).

To access the Raspberry Pi, you need the username and IP address for your IP:

Connecting to Pi using SSH

The default username for a Raspberry Pi is pi; use the following command to access the Pi (replacing the highlighted section with your PI’s IP address:

ssh pi@{ipaddress}

If you’re connecting using SSH for the first time, you may be prompted to continue connecting; type yes and hit return.

Enter the pi user’s password; you’ll be taken to the command prompt of the Raspberry Pi.

Adventures With A Raspberry Pi

Adventures With A Raspberry Pi
Building The Raspberry Pi: CanaKit Raspberry Pi 3 B+ Complete Starter Kit
Building The Raspberry Pi: Raspberry Pi Build
Building The Raspberry Pi: Install Operating System
Building The Raspberry Pi: First Run
Building The Raspberry Pi: System Configuration Tool
Building The Raspberry Pi: Enable SSH For Remote Access
Building The Raspberry Pi: Securing the Raspberry Pi
Building The Raspberry Pi: Conclusion
Installing Pi-hole On A Raspberry Pi: What is Pi-hole?
Installing Pi-hole On A Raspberry Pi: Install Pi-hole
Installing Pi-hole On A Raspberry Pi: Change Pi-hole Admin Password
Installing Pi-hole On A Raspberry Pi: Configure Network to use Pi-hole
Using Pi-hole On A Raspberry Pi: Blocked Adverts
Using Pi-hole On A Raspberry Pi: Admin Interface
Using Pi-hole On A Raspberry Pi: Disabling Pi-hole
Using Pi-hole On A Raspberry Pi: Whitelisting a Site
Using Pi-hole On A Raspberry Pi: Update Blocklists
Using Pi-hole On A Raspberry Pi: Maintain Blocklists
Using Pi-hole On A Raspberry Pi: Change DNS Servers
Using Pi-hole On A Raspberry Pi: Connecting With SSH
Using Pi-hole On A Raspberry Pi: Updating the Pi-hole
Using Pi-hole On A Raspberry Pi: Conclusion
What Else Can I Use It For?
Prepare New SD Card For Raspberry Pi OS: Download SD Card Formatter
Prepare New SD Card For Raspberry Pi OS: Install SD Card Formatter
Prepare New SD Card For Raspberry Pi OS: Format SD Card
Prepare New SD Card For Raspberry Pi OS: Download NOOBS
Prepare New SD Card For Raspberry Pi OS: Copy Files To The SD Card
Prepare New SD Card For Raspberry Pi OS: Conclusion
Installing Pi-hole On A Raspberry Pi: Changing the IP Address
Raspberry PI Update Fails
Check Version of OS on Raspberry Pi
How to Update the OS on a Raspberry Pi

Implementing SmartList Builder: SmartList Builder vs. SmartList Designer

eOne SolutionsThis post is part of the series on Implementing SmartList Builder from eOne Solutions.

As mentioned in the last post SmartList Builder was directly sold by Microsoft under a licensing agreement for many years until, with the launch of Microsoft Dynamics GP 2013 SP2, the product was released back to the original ISV; a Fargo based ISV called eOne S0lutions.

I understand this was because the new top person in charge of Microsoft Dynamics GP did not like licensing products from the ISVs and release quite a few back to the original developer. However, this left a gap in Microsoft Dynamics GP in that users could no longer create new SmartLists. And so, SmartList Designer was created.

In theory it fulfils the same job as SmartList Builder; you can create new SmartLists by joining tables together or by linking in a SQL view. When it was first released, I took a look at it as an alternative to SmartList Builder on the basis it was free as opposed to needing to buy SmartList Builder.

However, in every area, it is an inferior product. It is not as functional and it is not as easy to use.

Continue reading “Implementing SmartList Builder: SmartList Builder vs. SmartList Designer”