 Now that we have the first client installed, we can deploy the system database. By default the system database is called DYNAMCIS, but i have chosen to use one called D16R1. To deploy the system database, hit the Windows start button, search for and launch GP Utilities.
While I do try to minimise the use of the sa account as it is the SQL Server system administrator account, the initial implementation of Dynamics GP does require its use. So, on the Welcome to Microsoft Dynamics GP Utilities window enter sa in the User ID field and enter the relevant password.
Once done, click OK:

A second welcome window will be displayed. Click Next:

On Installation Options I always select Advanced before clicking Next so I can configure Dynamics GP correctly:

For the Database Setup select the location of the Data and Log files. Unfortunately, GP Utilities defaults to the installfolder of SQL Server instead of the defaulty data and log locations so I find I always have to amend the path before clicking Next:

The maximum account length and number of segments for Dynamics GP is 66 and 10 respectively and this is what I always enter on the Set Up Account Framework step as it allows for maximum flexibility:

The names and lengths of the Segments can be amended. I will be deploying the Fabrikam sample company so have named the first three segments Division, Account and Department and left the lengths at 6:

Additional sorting options can be defined; to do this mark the Yes radio button in answer to the Do you want to be able to sort by segments of your account framework, as well? question:

Segments you want to be able to sort by need to be moved from the Available Segments list to the Selected Sorting Options list by selecting them and clicking Add. Once finished, click Next to proceed:

Verify that you are happy with the configuration of the account framework; click Back to make changed or Next to proceed:

Enter the password for the DYNSA account; this is the Dynamics system administrator account which should be used in preference to the sa account wherever possible when working with Dynamics GP:

If the web client will be used, the Web Client SQL Server Login needs to be specified.
Mark the Using web client checkbox and enter the Login Name and Password.
This is the account which will be used for connecting to the SQL Server when a Windows or Organisational account web client only user is logged into the web client:

Choose your Authentication Type type: Organisational Account when using Azure or Windows Account. If selecting an Organisational Account you will need to enter the Azure details, but I am installing in local VMs running on Hyper-V so there are no additional settings to enter on this step:

Next enter a System Password; this password us used to control access to systemwide information. As I am working ona demo system I have not entered a password, but it is recommended on a production system:

Confirm the information entered in previous steos and the click Finish to proceed with deploying the system database:

Once the system database has been created, the next step is to enter the information for the Business Intelligence reports. If you are going to use Microsoft SQL Server Reporting Services Setup and Microsoft Excel reports mark both checkboxes and then click Next:

There are two Report Server Modes which are supported: Native and SharePoint. I am trying to keep my demo system as clean as possible so don’t have a SharePoint server included so have selected Native.
I have then entered the Report Server URL and Report Manager URL which is running on the SQL Server; I often separate out the reporting server as a different box, but opted against that this time.
The Folder name defaults to the name of the system database; this is, I’m fairly sure, different to the previous version where the folder name was by default blank (and is not just a change, but an improvement):

Again the Location of the Excel reports can be either Network or SharePoint and I have selected a network location (before starting I created a share on my SQL Server):

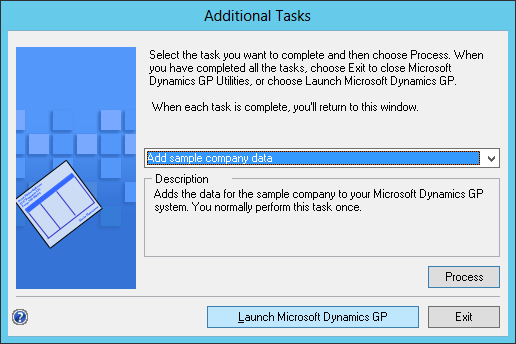
The final step of the deployment of the system database is to either add the sample company or create a new company. I will be doing both of the tasks over the next three posts in this series, but for now have opted just to click Exit:
Click to show/hide the Hands On With Microsoft Dynamics GP 2016 R1 Series Index
What should we write about next?
If there is a topic which fits the typical ones of this site, which you would like to see me write about, please use the form, below, to submit your idea.
11 thoughts on “Hands On With Microsoft Dynamics GP 2016 R1: Deploy System Database”