 This post is part of a series on creating a Journal – Standard integration using SmartConnect from eOne Solutions; I recently posted a series on Implementing SmartConnect.
With the Destination configuration started, the next step is to define the distribution field mapping.
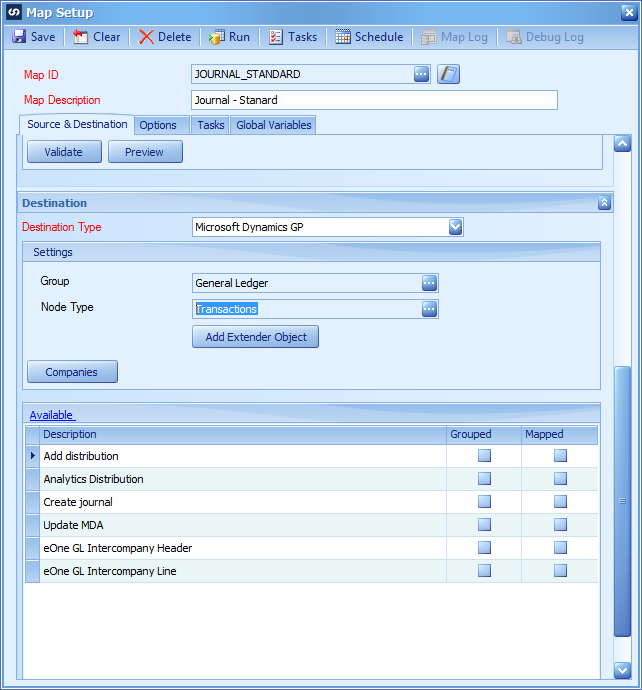
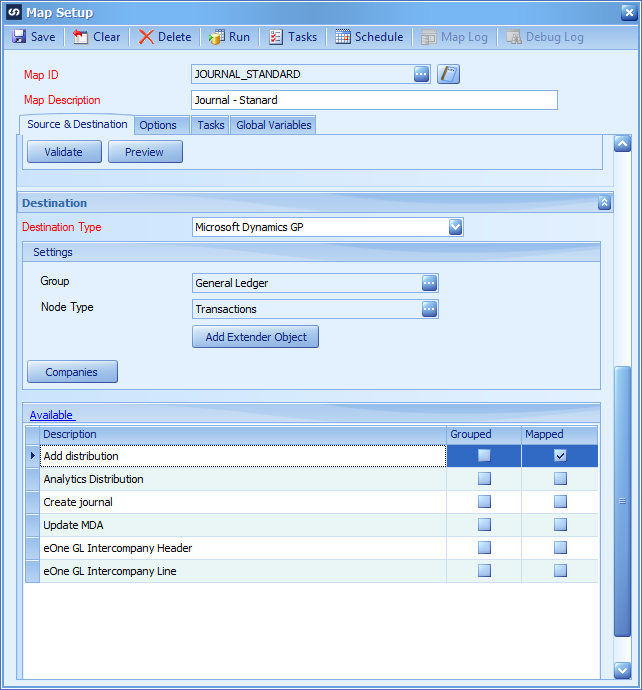
Double click the Add distribution entry in the scrolling window at the bottom of the Map Setup window when the Destination section is selected:
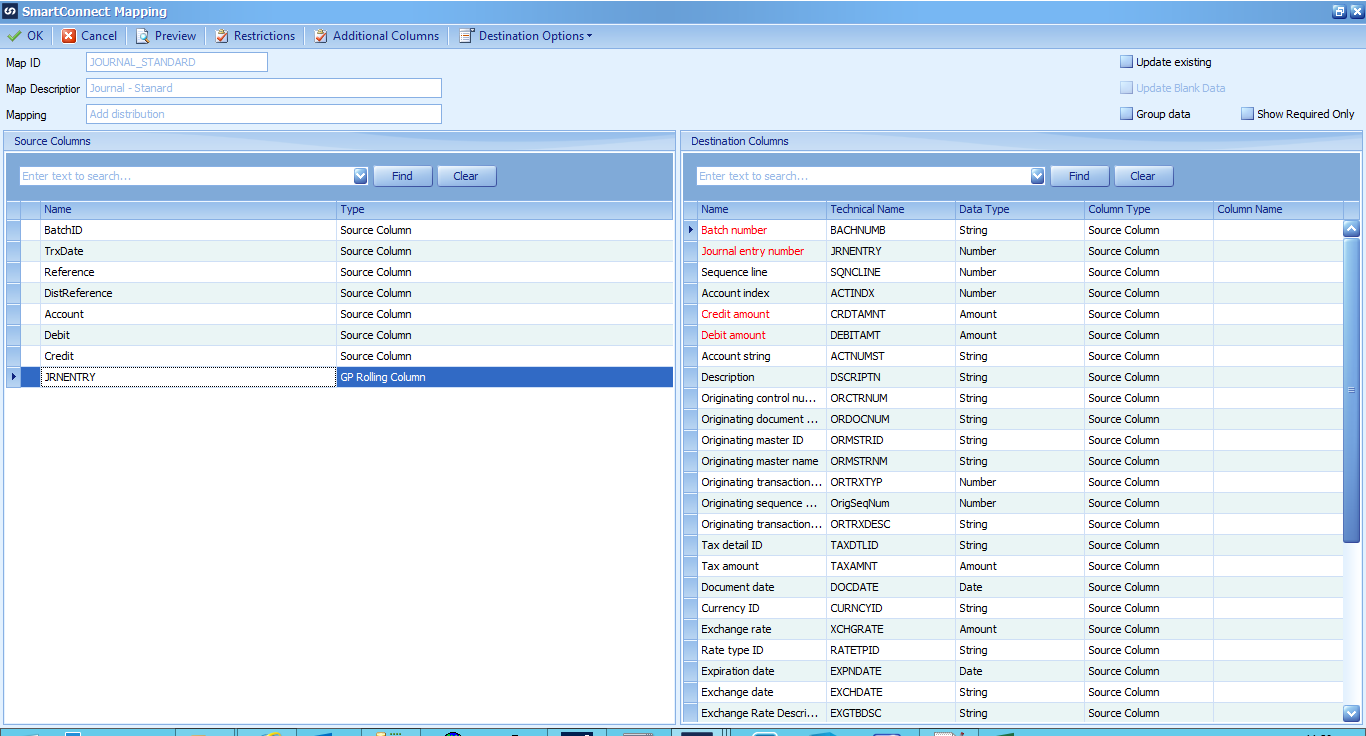
The source spreadsheet includes all of the required fields, except for one; the Journal Entry Number. This is not a field which you want users to supply, but because SmartConnect sits on top of eConnect, the integration needs to supply it.
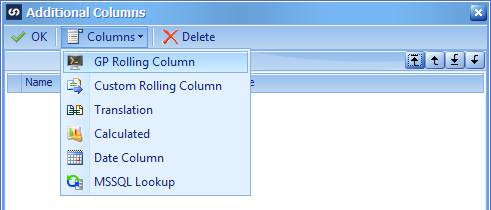
Fortunately, SmartConnect includes functionality which allows you to get this information. The functionality is called a GFP Rolling Column. To create one of these columns, click the Additional Column button on the toolbar and, in the Additional Columns window which opens, click on the COlumns button and select GP Rolling Column:
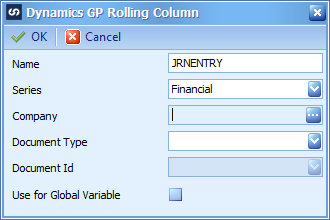
The Dynamics GP Rolling Column window will open; enter JRNENTRY in the Name field and select a Series of Financial:
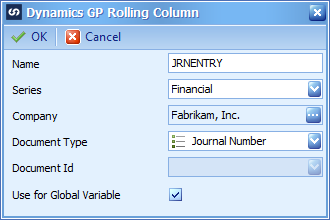
Click the ellipsis button next to the Company field and then select the company from the lookup from which the next Journal entry number should be derived (this should match the company selected in the main Destination window:
Use the dropdown and select a Document Type of Journal Number.
The Journal Entry number we get into this additional column needs to be available to both the distributions and also the journal header, so ensure you mark the Use for Global Variable checkbox.
Click OK to save the changes and create the rolling columns and then click OK to close the Additional Columns window:
The new JRNENTRY additional column will be listed at the end of the available columns in the left oane of the SmartConnect Mapping window.
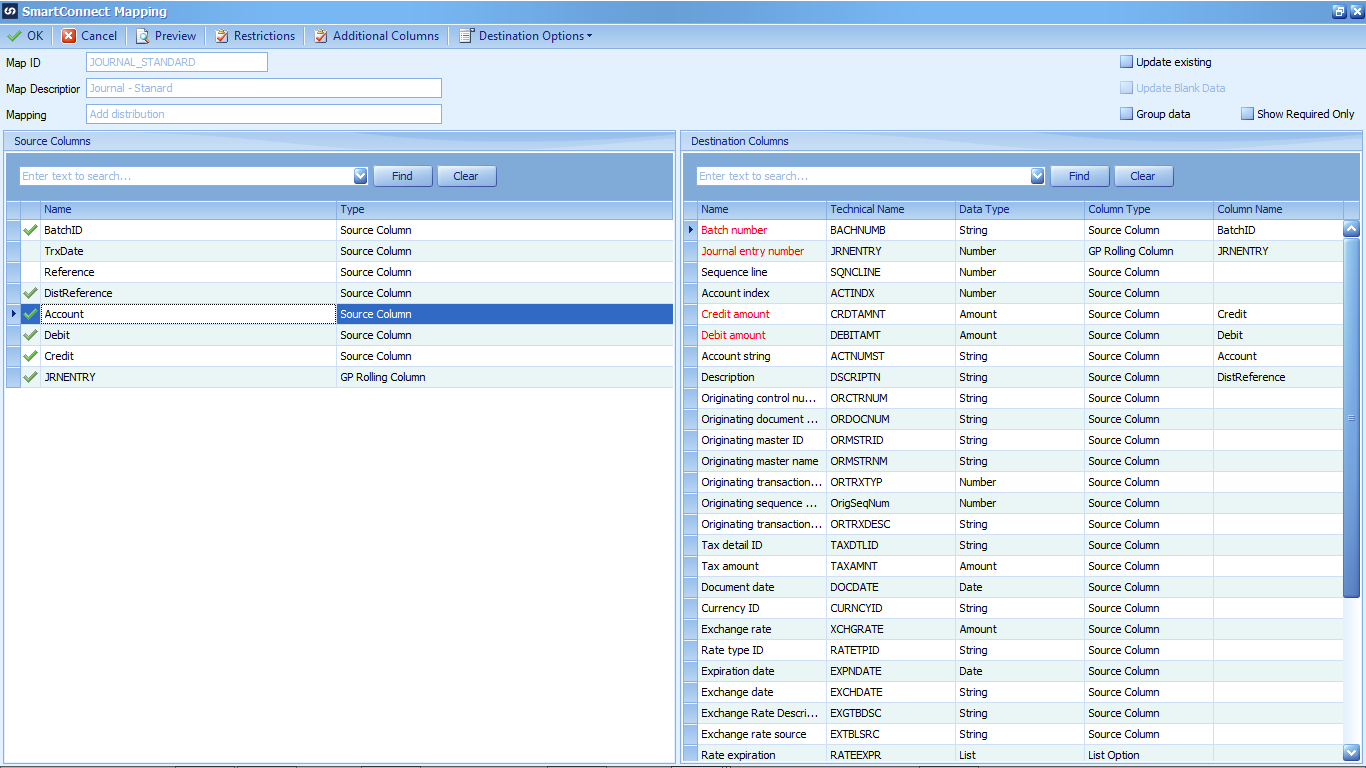
Mapping the source fields from the left to the right is just a case of drag-and-drop from one side to the other.
The destination side has both an Account Index as well as an Account String column making mapping easy; additionally, mandatory fields are shown in red (not great for someone colour blind like myself, but there is a Show Required Only checkbox at the top right of the window).
Once all fields have been correctly mapped, click the OK button to return to the Map Setup window; a mark in the Mapped on the Add distributions row will show that the distributions have been mapped:
In the next post, I’ll cover the mapping of the journal header.
What should we write about next?
If there is a topic which fits the typical ones of this site, which you would like to see me write about, please use the form, below, to submit your idea.


