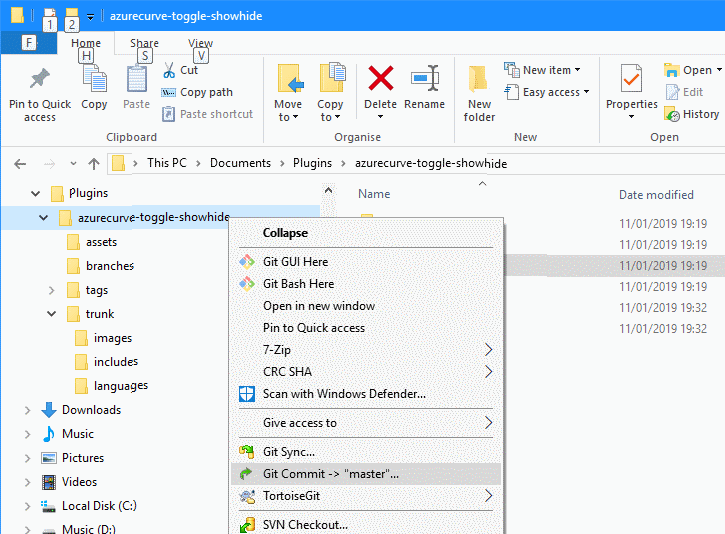
 When I started developing plugins for ClassicPress I decided that I needed to be using source control. As ClassicPress is intending to use GitHub for their plugin directory, it made sense for me to use it as well. This post is part of a series on ClassicPress Development with GitHub.
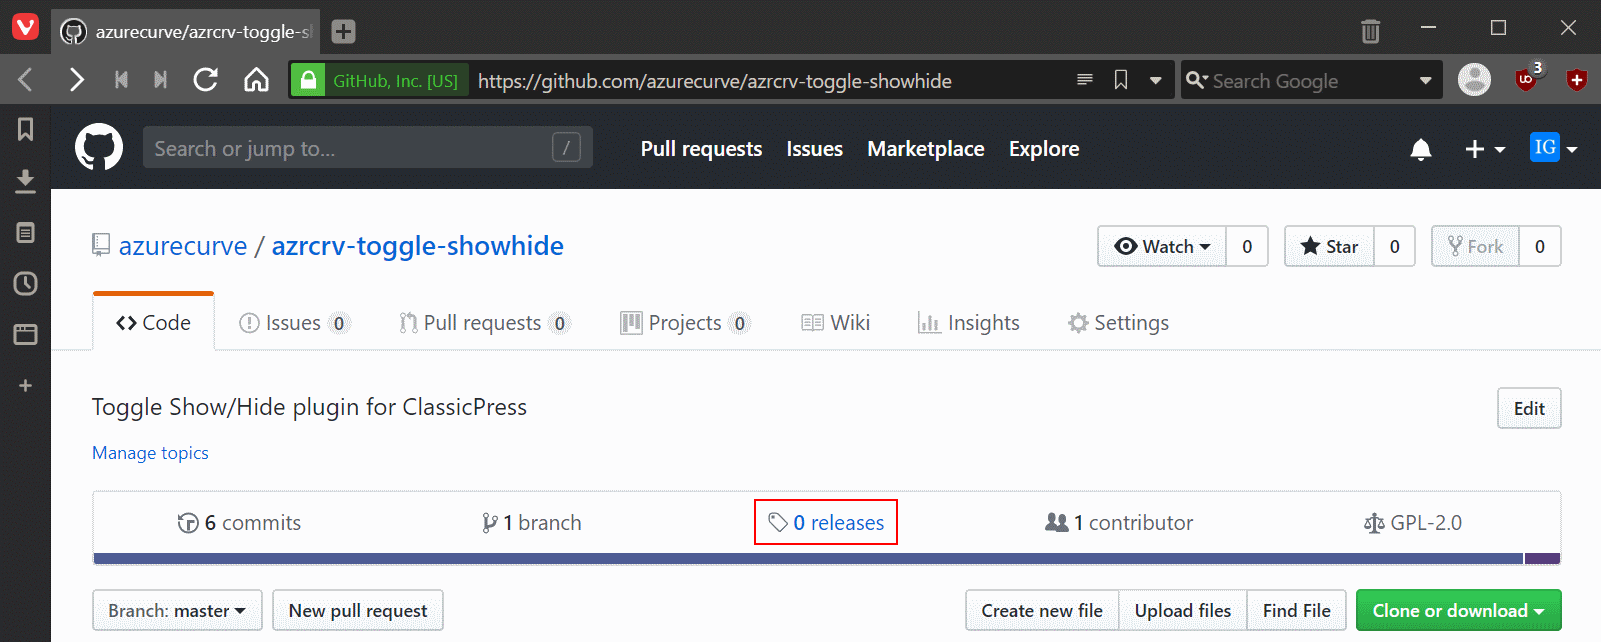
When developing with GitHub, you can make a release; this is a way of grouping together all of the changes since the last release to make it easy to download that particular code set. One point to note, is that while GitHub will automatically create a zip of the source code, this isn’t suitable to use for a ClassicPress release as it will include -master in the contained directory name. However, you can upload a zip file containing the code in the correct folder.
To create a new release, load the repository page on GitHub and click the releases button (red ringed):
Continue reading “ClassicPress Development with GitHub: Create Release”