Implementing Fastpath’s Audit Trail: Apply templates

FastpathThis post is part of the series on Implementing Fastpath's Audit Trail and is part of the parent Implementing Fastpath's Assure Suite series.

A couple of psots ago I covered the creation of triggers for auditing information. This allows you to create any trigger you want, but can be a somewhat long-winded way of doing things. Fortunately, Fastpath provide a number of templates which you can apply as a shortcut.
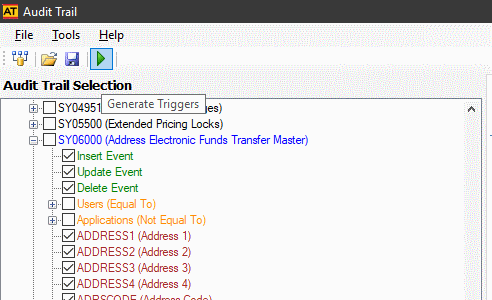
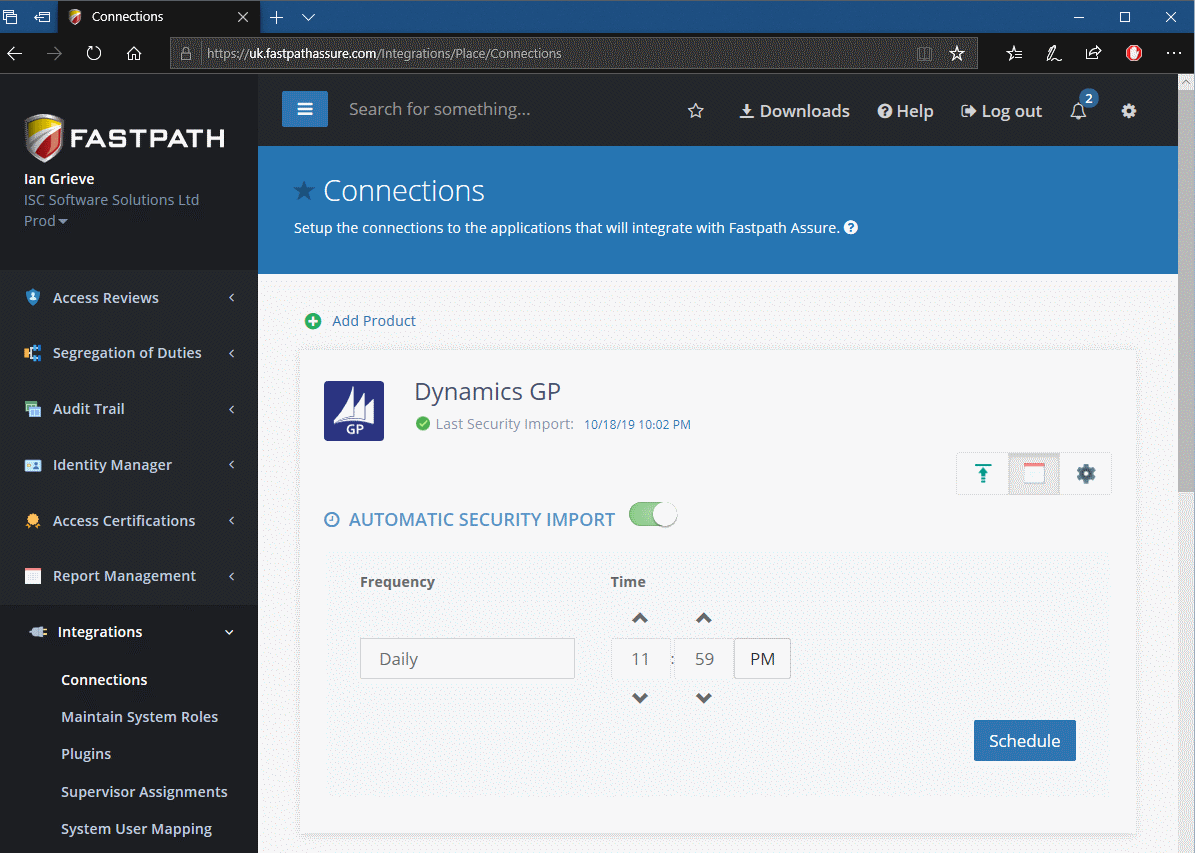
To apply a template, click (Tools » Templates) on the application menu:

Tools menu

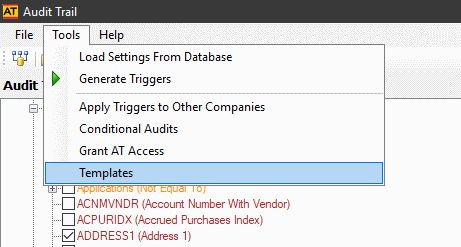
Continue reading “Implementing Fastpath’s Audit Trail: Apply templates”

Implementing Fastpath’s Audit Trail: Create Triggers

FastpathThis post is part of the series on Implementing Fastpath's Audit Trail and is part of the parent Implementing Fastpath's Assure Suite series.

Once you have tables selected for auditing, the next step is to create the triggers in the database. To create the triggers, click the Create Triggers button on the toolbar:

Audit Trails - Create trigger button

Continue reading “Implementing Fastpath’s Audit Trail: Create Triggers”

Implementing Fastpath’s Audit Trail: Select tables to audit

FastpathThis post is part of the series on Implementing Fastpath's Audit Trail and is part of the parent Implementing Fastpath's Assure Suite series.

Audit Trails tracks changes by creating triggers on SQL Server. When you create the triggers you do so by selecting a table, choosing the events to track and which fields to be audited:

Audit Trails

You can separately choose to track inserts, updates and deletes by marking the relevant boxes, although in most cases you would want to track all three.

Next you can select any of the fields on the table for auditing; I’d recommend against tracking everything as this can make the audit data very large and if there are fields you don’t populate or aren’t important, then there is no point auditing them.

Likewise, you can audit as many tables as you want, but I’d recommend against auditing all tables as this can have an impact on performance. I’d also recommend against auditing transaction tables due to the volume of data which would pass through them.

In the next post, I’ll show how to apply the triggers for the selected tables and fields.

Implementing Fastpath's Audit Trail

Implementing Fastpath's Assure Suite

Implementing Fastpath’s Assure Suite
Implementing Fastpath's Assure Suite: Who are Fastpath?
Implementing Fastpath's Assure Suite: What is Assure Suite?
Implementing Fastpath's Assure Suite: Pre-installation steps
Implementing Fastpath's Assure Suite: Sign Into Support Portal
Implementing Fastpath's Assure Suite: Download Assure Suite
Implementing Fastpath's Audit Trail: Configuration
Implementing Fastpath's Identity Manager: Configure AD Settings
Implementing Fastpath's Assure Suite: Run minimum permissions script
Implementing Fastpath's Assure Suite: Install the Hybrid Connection Manager
Implementing Fastpath's Assure Suite: Configure Hybrid Connection Manager
Implementing Fastpath's Assure Suite: Setup cloud connection
Implementing Fastpath's Assure Suite: Schedule security import
Implementing Fastpath's Assure Suite: Schedule Audit Trails data collection
Implementing Fastpath's Audit Trail: Grant AT Access
Implementing Fastpath's Audit Trail: Select company to audit
Implementing Fastpath's Audit Trail: Select tables to audit
Implementing Fastpath's Audit Trail: Create Triggers
Implementing Fastpath's Audit Trail: Apply templates
Implementing Fastpath's Audit Trail: Apply triggers to other companies
Implementing Fastpath's Audit Trail: Transfer between systems
Implementing Fastpath's Assure Suite: Create new portal user
Implementing Fastpath's Assure Suite: Assign Permissions
Implementing Fastpath's Audit Trail: Ad hoc data collect
Implementing Fastpath's Audit Trail: Review data changes
Implementing Fastpath's Audit Trail: View reports

Implementing Fastpath’s Audit Trail: Select company to audit

FastpathThis post is part of the series on Implementing Fastpath's Audit Trail and is part of the parent Implementing Fastpath's Assure Suite series.

While Audit Trails allows you to audit changes to any SQL Server database. When you first log into Audit Trails you will be prompted to login and select a database:

Select company

Continue reading “Implementing Fastpath’s Audit Trail: Select company to audit”

Implementing Fastpath’s Audit Trail: Grant AT Access

FastpathThis post is part of the series on Implementing Fastpath's Audit Trail and is part of the parent Implementing Fastpath's Assure Suite series.

The Audit Trails software can be installed on any machines necessary and connect to the same SQL Server database. Users need to be granted access to Audit Trail in order to access the application. To do this, log into Audit Trail and click (Tools » Grant AT Access):

Tools menu

Continue reading “Implementing Fastpath’s Audit Trail: Grant AT Access”

ClassicPress Development with TortoiseGit: Revert Last Commit

TortoiseGitWhen I started developing plugins for ClassicPress I decided that I needed to be using source control. As ClassicPress is intending to use GitHub for their plugin directory, it made sense for me to use it as well. This post is part of a series on ClassicPress Development with TortoiseGit which is a sub-series of the ClassicPress Development with GitHub series.

When you have changes committed to GitHub, you need to make a release of your plugin. Making a release has two main benefits:

  1. It labels the files in the repository with a tag making it easy to download a particular version of the plugin.
  2. You can upload a zip file containing the plugin folder giving a zip file which users can download and upload to their ClassicPress site.

To create a release, open the GitHub repository page and click the releases link at the top (ringed in red):

Github repository

Continue reading “ClassicPress Development with TortoiseGit: Revert Last Commit”

ClassicPress Development with TortoiseGit: Commit

TortoiseGitWhen I started developing plugins for ClassicPress I decided that I needed to be using source control. As ClassicPress is intending to use GitHub for their plugin directory, it made sense for me to use it as well. This post is part of a series on ClassicPress Development with TortoiseGit which is a sub-series of the ClassicPress Development with GitHub series.

Once the repository has been cloned and changes made, you need to submit the changes back to the repository to keep control of changes. This is referred to as a “commit”. To commit your change, right-click the folder (or file) to commit and select Git Commit -> “master” on the context menu:

Git Commit

Continue reading “ClassicPress Development with TortoiseGit: Commit”

Implementing Fastpath’s Assure Suite: Schedule Audit Trails data collection

FastpathThis post is part of the series on Implementing Fastpath's Assure Suite.

The final step of the Fastpath Assure portal configuration is to schedule the collect of data for Audit Trails

To do this, log into the Fastath Assure portal and in the navigation pane select (Audit Trail » Setup » Manage Data) and click the calendar button.

Select the frequency and configure the other options (which change depending on the frequency) and click Schedule:

Schedule Collect Data Changes

In the above example I have set a daily frequency with the collect happening at 0500.

Implementing Fastpath's Audit Trail

Implementing Fastpath's Assure Suite

Implementing Fastpath’s Assure Suite
Implementing Fastpath's Assure Suite: Who are Fastpath?
Implementing Fastpath's Assure Suite: What is Assure Suite?
Implementing Fastpath's Assure Suite: Pre-installation steps
Implementing Fastpath's Assure Suite: Sign Into Support Portal
Implementing Fastpath's Assure Suite: Download Assure Suite
Implementing Fastpath's Audit Trail: Configuration
Implementing Fastpath's Identity Manager: Configure AD Settings
Implementing Fastpath's Assure Suite: Run minimum permissions script
Implementing Fastpath's Assure Suite: Install the Hybrid Connection Manager
Implementing Fastpath's Assure Suite: Configure Hybrid Connection Manager
Implementing Fastpath's Assure Suite: Setup cloud connection
Implementing Fastpath's Assure Suite: Schedule security import
Implementing Fastpath's Assure Suite: Schedule Audit Trails data collection
Implementing Fastpath's Audit Trail: Grant AT Access
Implementing Fastpath's Audit Trail: Select company to audit
Implementing Fastpath's Audit Trail: Select tables to audit
Implementing Fastpath's Audit Trail: Create Triggers
Implementing Fastpath's Audit Trail: Apply templates
Implementing Fastpath's Audit Trail: Apply triggers to other companies
Implementing Fastpath's Audit Trail: Transfer between systems
Implementing Fastpath's Assure Suite: Create new portal user
Implementing Fastpath's Assure Suite: Assign Permissions
Implementing Fastpath's Audit Trail: Ad hoc data collect
Implementing Fastpath's Audit Trail: Review data changes
Implementing Fastpath's Audit Trail: View reports

Implementing Fastpath’s Assure Suite: Schedule security import

FastpathThis post is part of the series on Implementing Fastpath's Assure Suite.

The penultimate step of the Fastpath Assure portal configuration is to schedule the automatic security import.

Log into the Fastpath Assure portal, expand Integrations, select Connections and click the calendar icon.

Set the required Frequency and Time and then click Schedule:

Fastpath Assure portal >> Automatic Security Import

Click to show/hide the Implementing Fastpath's Assure Suite Series Index

Implementing Fastpath’s Assure Suite
Implementing Fastpath's Assure Suite: Who are Fastpath?
Implementing Fastpath's Assure Suite: What is Assure Suite?
Implementing Fastpath's Assure Suite: Pre-installation steps
Implementing Fastpath's Assure Suite: Sign Into Support Portal
Implementing Fastpath's Assure Suite: Download Assure Suite
Implementing Fastpath's Audit Trail: Configuration
Implementing Fastpath's Identity Manager: Configure AD Settings
Implementing Fastpath's Assure Suite: Run minimum permissions script
Implementing Fastpath's Assure Suite: Install the Hybrid Connection Manager
Implementing Fastpath's Assure Suite: Configure Hybrid Connection Manager
Implementing Fastpath's Assure Suite: Setup cloud connection
Implementing Fastpath's Assure Suite: Schedule security import
Implementing Fastpath's Assure Suite: Schedule Audit Trails data collection
Implementing Fastpath's Audit Trail: Grant AT Access
Implementing Fastpath's Audit Trail: Select company to audit
Implementing Fastpath's Audit Trail: Select tables to audit
Implementing Fastpath's Audit Trail: Create Triggers
Implementing Fastpath's Audit Trail: Apply templates
Implementing Fastpath's Audit Trail: Apply triggers to other companies
Implementing Fastpath's Audit Trail: Transfer between systems
Implementing Fastpath's Assure Suite: Create new portal user
Implementing Fastpath's Assure Suite: Assign Permissions
Implementing Fastpath's Audit Trail: Ad hoc data collect
Implementing Fastpath's Audit Trail: Review data changes
Implementing Fastpath's Audit Trail: View reports

Implementing Fastpath’s Assure Suite: Setup cloud connection

FastpathThis post is part of the series on Implementing Fastpath's Assure Suite.

With the Hybrid Connection Manager configured, the next step of the configuration is to update the portal with the server settings. Log into the Fastpath Assure portal (or here if you’re in the UK), select Integrations and click Connections.

Click the cog icon and fill in the details for the GP Connection Settings; even if you’re using a named SQL Server instance, you can leave this box empty.

if you’re using Identity Manager, select your version of Microsoft Dynamics GP, selecting GP 2016 for that or any later version.

Click Save to save the changes:

Fastpath Assure portal - GP Connector Settings

Continue reading “Implementing Fastpath’s Assure Suite: Setup cloud connection”