VAT Bus. Posting Group Error in Get Shipment Lines in Microsoft Dynamics 365 Business Central

Microsoft Dynamics 365 Business CentralWhile working with a client recently to implement Microsoft Dynamics 365 Business Central, they reported an error to me during UAT when trying to test the sales process. They’d raised and shipped a sales order and were now trying to use the Get Shipment Lines function on the Sales Invoice page, but when selecting the shipment lines they were receiving this error:
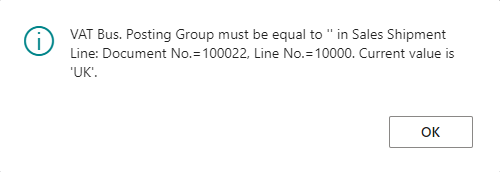
Error using Get Shipment Lines function

VAT Bus. Posting Group must be equal to '' in Sales Shipment Line: Document No.=100022. Current value is 'UK'.

I did a little investigation with them and discovered that the error was for a single customer; shipment lines for other customers could be selected without problem.

It turned out the root cause was that the customer did not have a VAT Bus. Posting Group selected on the customer card; this field would default to the sales order header and then pull through to the order lines as they are added. Because it was missing, the user had manually added the VAT details to the order lines, but not the header. When the sales invoice was raised, the VAT Bus. Posting Group did not default to the header, so when the shipment lines were selected there was a mismatch resulting in the error message.

Once the VAT was added to the header (and the customer card so it would default in future), the sales shipment lines could successfully be added to the invoice.

I had advised the customer that customer templates should be used to default in the required fields on customers as they are created, but they had not done this. A customer template created for each geography (UK, EU, ROW) would have allowed the VAT Bus. Posting Group, and other posting groups and fields like payment terms, to default when the customer was created.

Error Calculating Depreciation in Microsoft Dynamics 365 Business Central: “No journal lines were created”

Microsoft Dynamics 365 Business CentralI helped a client implement the Fixed Asset Management module in Microsoft Dynamics 365 Business Central recently; during training I showed them how to configure and use the module and also created configuration packages for them to import both the fixed asset itself as well as the acquisition and depreciation to date.

After importing the assets into Business Central with a net book value up to the last day of the previous month, they tried to run depreciation for the assets, but encountered a problem where no depreciation was calculated:

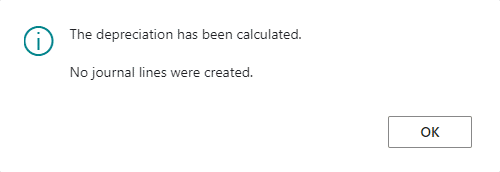
Error trying to depreciate fixed assets

The depreciation has been calculated

No journal lines were created.

They keyed a new asset onto the system and tried depreciation and that asset did depreciate so there was obviously no general problem with the setup of the module, depreciation book or assets.

Looking at the data in the table, there was no obvious difference between them; there were a few fields different such as dates, values and similar in the Fixed Asset (5600) and FA Depreciation Book (5612) tables, but nothing which would impact the depreciation. It actually took a colleague to spot the difference, as I was reading the field as being the net book value (which is actually in the Book Value field, but was in fact the Ending Book Value field, which is used to set a residual amount for depreciation, below which the asset won’t depreciate.

When the client populated the configuration package, they had not remembered my mentioning this field during training, and for what it was intended, and entered the same value in both the Book Value and Ending Book Value fields, so Business Central was treating the assets as depreciated as far as they should depreciate. A quick configuration package update to the Ending book Value and the assets were able to be depreciated as required.

In Microsoft Dynamics 365 Business Central (Inventory and Warehouse Management), how do I… Mass Insert Item Pictures

Microsoft Dynamics 365 Business CentralThis post is part of the In Microsoft Dynamics 365 Business Central (Inventory and Warehouse Management), how do I… series and of the wider In Microsoft Dynamics 365 Business Central, how do I… series which I am posting as I familiarise myself with Microsoft Dynamics 365 Business Central.

Business Central allows pictures to be attached to each item on the Item card page, but doing it individually through this page will be a very slow process, even for quite small systems. Fortunately, there is a function which allows the bulk import of pictures for items.

To use the import, all you need is a zip file containing the items, where the name of the file is the Item Number and the file is an image file such as bmp, jpg or png (the help files aren’t especially helpful as to acceptable types, but I have seen these three used). I would recommend that the images imported not be too large; use a reasonable resolution image and be run them through a minifier to use the best encoding.

When you have your import ready, open the Inventory Setup page and select the General » Import Item Pictures action:

Inventory Setup page showing the General action bar

Continue reading “In Microsoft Dynamics 365 Business Central (Inventory and Warehouse Management), how do I… Mass Insert Item Pictures”

Microsoft Dynamics 365 Business Central Configuration Package Import Error: “The package code in all sheets of the Excel file must match the selected package code…”

Microsoft Dynamics 365 Business CentralI’ve been doing some work with a client recently to implement Microsoft Dynamics 365 Business Central. We created a number of different configuration packages to import data into different areas of Business Central which were used without issue.

However, when we came to import the fixed assets, we received an error during import:

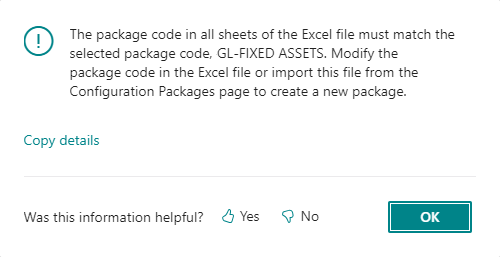
Configuration Package error

The package code in all sheets of the Excel file must match the selected package code, GL-FIXED-ASSETS. Modify the package code in the Excel file or import this file from the Configuration Packages page to create a new package.

Continue reading “Microsoft Dynamics 365 Business Central Configuration Package Import Error: “The package code in all sheets of the Excel file must match the selected package code…””

Item No. Field Missing from the Item Card Page in Microsoft Dynamics 365 Business Central

Microsoft Dynamics 365 Business CentralWhile implementing Microsoft Dynamics 365 Business Central for a client, they reported an issue during UAT where they couldn’t set the No. for new items as the field was missing from the Item Card (30) page.

My initial thought was that the user had inadvertently removed the field from the page using personalise, but they had asked other users to try and they had the same issue. The other potential cause, was a profile personalization which had removed the field for all users, but this was also not the case, as the field wasn’t available to add back.

I did a test with a role containing no changes and found the same issue:

Item card page with the No. field missing

Continue reading “Item No. Field Missing from the Item Card Page in Microsoft Dynamics 365 Business Central”

New Functionality In Microsoft Power Automate 2024 Wave 1: View Attended Desktop Flow Runs Using Picture-in-Picture Execution Mode

Power AutomateThis post is part of the New Functionality In Microsoft Power Automate 2024 Wave 1 series in which I am taking a look at the new functionality introduced in Microsoft Power Automate 2024 Wave 1.

The 9th of the new functionality in the Desktop Flows section is view attended desktop flow runs using picture-in-picture execution mode.

The flow run does not interfere with the user’s work on the machine as makers can run attended desktop flows in a virtual window that replicates the main desktop.

Enabled for: Admins, makers, marketers, or analysts, automatically
Public Preview: Feb 2024
Early Access: –
General Availability: Apr 2024

Feature Details

Makers can trigger attended and local attended desktop flows within an isolated Windows session in picture-in-picture mode. You can trigger the picture-in-picture mode through the Power Automate console, or through the desktop flows connector.

Click to show/hide the New Functionality In Microsoft Power Automate 2024 Wave 1 Series Index

New Functionality In Microsoft Power Automate 2024 Wave 1: Connect Your Own Virtual Network with Hosted Machine Group

Power AutomateThis post is part of the New Functionality In Microsoft Power Automate 2024 Wave 1 series in which I am taking a look at the new functionality introduced in Microsoft Power Automate 2024 Wave 1.

The 8th of the new functionality in the Desktop Flows section is connect your own virtual network with hosted machine group.

Users can run desktop flows using a hosted machine group connected to their own virtual network (VNet) in order to execute RPA jobs that require access to on-premises networks.

Enabled for: Admins, makers, marketers, or analysts, automatically
Public Preview: Mar 2024
Early Access: –
General Availability: Apr 2024

Feature Details

Users can now seamlessly integrate a hosted machine group (HMG) with their own VNet. This integration enables users to run desktop flows and execute RPA jobs that require access to on-premises networks. By leveraging their own VNet, users can ensure secure and reliable connectivity between the hosted machines and the on-premises networks.

Click to show/hide the New Functionality In Microsoft Power Automate 2024 Wave 1 Series Index

Error When Connecting Jet Reports to Microsoft Dynamics 365 Business Central for the First Time

Jet ReportsWhile implementing Microsoft Dynamics 365 Business Central recently for a clinet, we also implemented Jet Reports. After installing the extension in Business Central, I created a data source and tried to log in, but received this error message:

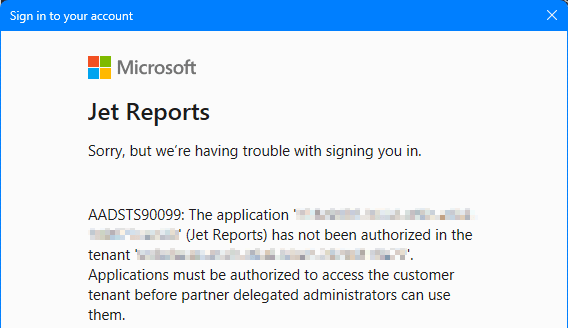
Jet reports sign in error

Jet reports

Sorry, but we're having trouble with signing you in.

AADSTS90099: The application '~~~~~~~' (Jet Reports) has not been authorised in the tenant '~~~~~~~'. Applications must be authorised to access the customer tenant before partner delegated administrators can use them.

It’s actually an obvious one which I should have remembered; the first sign into the data source is the one which grants permissions to sign in and so needs to be done by a Microsoft 365 administrator for the Business Central tenant.

As the Business Central partner, this was not me. After co-ordinating with the client and their Microsoft 365 partner, we got an administrator to sign into the data source for the first time, granting permissions as they did so, after which I was able to confirm the data source worked and giving users at the client access.

New Functionality In Microsoft Power Automate 2024 Wave 1: Generate Flow Description Using AI

Power AutomateThis post is part of the New Functionality In Microsoft Power Automate 2024 Wave 1 series in which I am taking a look at the new functionality introduced in Microsoft Power Automate 2024 Wave 1.

The 7th of the new functionality in the Desktop Flows section is generate flow description using AI.

Users are able to generate a description of a flow without having to analyze the actions inside it.

Enabled for: Admins, makers, marketers, or analysts, automatically
Public Preview: Apr 2024
Early Access: –
General Availability: –

Feature Details

You can now create a flow description by the press of a button without having to open the flow and read the actions inside it.

To do so from Power Automate for desktop, open the console, navigate to the My flows tab, and locate the flow that you want to create a description. Then, go to flow properties and under the general flow properties tab, press the Let Copilot create description button. Copilot will then analyze your flow and generate the flow description.

You can also generate a flow description from the portal. To do so, locate the desktop flow that you want to create the description for and press on the details item from the flow menu. Then, press on the edit button in the details section of the flow and finally select the Let Copilot create description button.

Geographic areas

This feature will be released into the following Microsoft Azure geographic area:

  • United States

Click to show/hide the New Functionality In Microsoft Power Automate 2024 Wave 1 Series Index

New Functionality In Microsoft Power Automate 2024 Wave 1: Use Azure Key Vault Credentials in Flow Connections

Power AutomateThis post is part of the New Functionality In Microsoft Power Automate 2024 Wave 1 series in which I am taking a look at the new functionality introduced in Microsoft Power Automate 2024 Wave 1.

The 6th of the new functionality in the Desktop Flows section is use Azure Key Vault credentials in flow connections.

Users can leverage credentials from Azure Key Vault to connect to Windows sessions on desktop flow machines. This feature supports rotating passwords without the need to update the connection

Enabled for: Admins, makers, marketers, or analysts, automatically
Public Preview: Oct 31, 2023
Early Access: –
General Availability: Jun 2024

Feature Details

With this feature, users can have their desktop flows run on Windows machines logged in with credentials from Azure Key Vault. The Windows machine retrieves the latest credentials at runtime. This enables desktop flows to keep running successfully even when the administrator changes the password.

Click to show/hide the New Functionality In Microsoft Power Automate 2024 Wave 1 Series Index