 Before we can start installing the Microsoft Dynamics GP 2013 SP2 Web Client, there are a few steps which need to be completed.
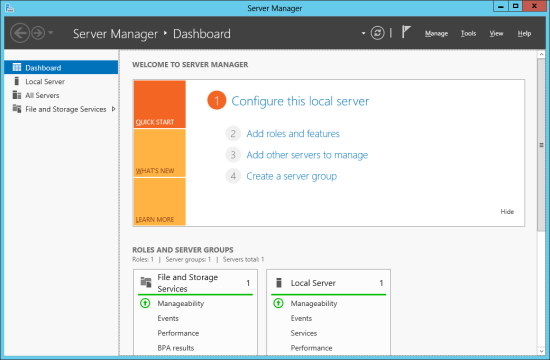
The first of them is to install the IIS Web Server on the machine which will operate as the Session Control Server. In my case, this is the SC1 machine which is running Windows Server 2012. IIS is installed via Server Manager by clicking Add roles and features:
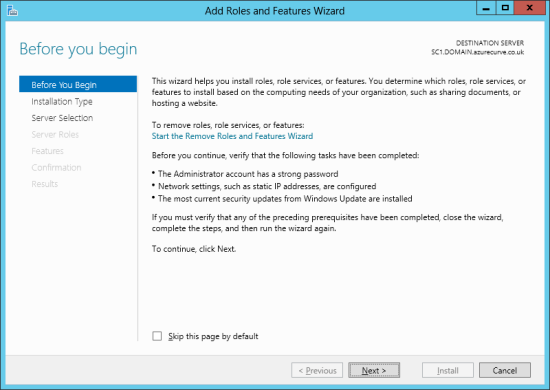
Read the Before you begin page and ensure you have completed the listed tasks and then click Next:
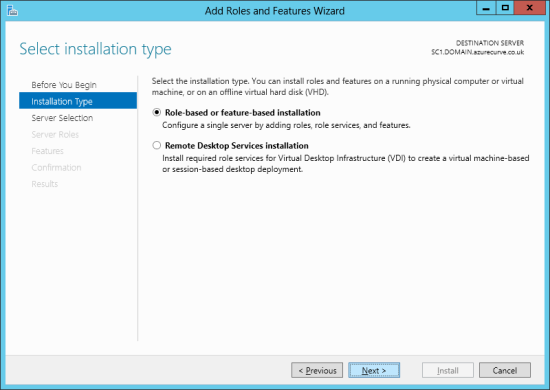
For the Installation Type step, accept Role-based or feature-based installation and click Next:
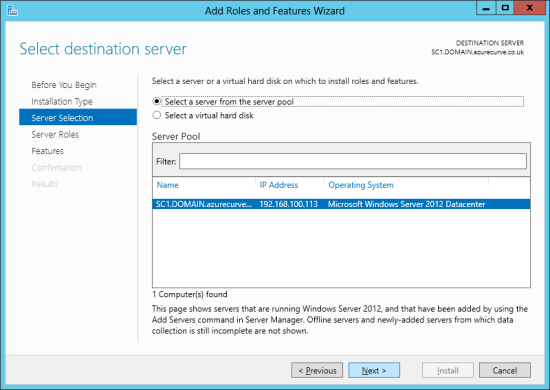
Choose the server IIS is to be installed on from the list, which in this example is SC1:
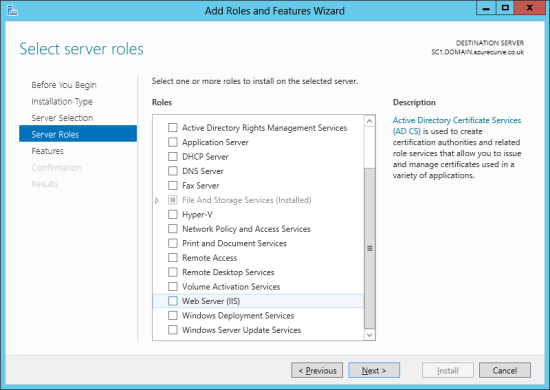
Scroll down and mark Web Server (IIS):
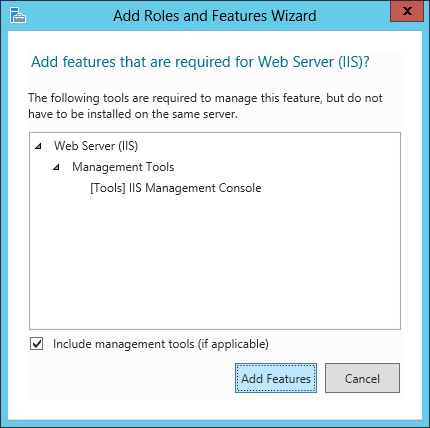
A dialog will be displayed showing the features required to manage the IIS feature. Click Add Features button to proceed:
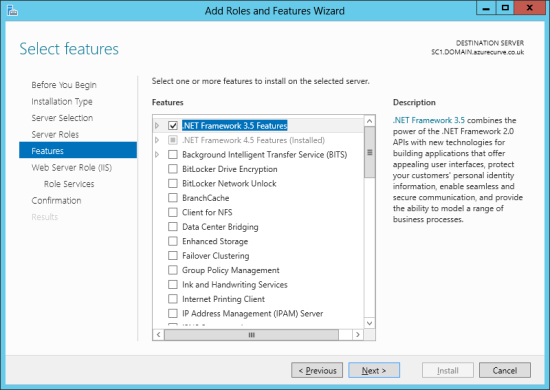
Click Next to move onto Features and mark .NET Framework 3.5 Features and then click Next:
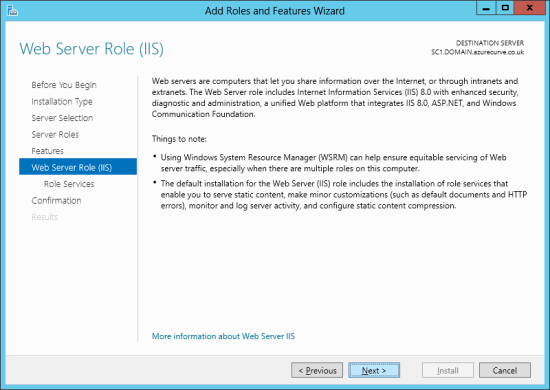
The next step is an overview of the Web Server Role (IIS) and a short list of things to note. Read this information and then click Next:
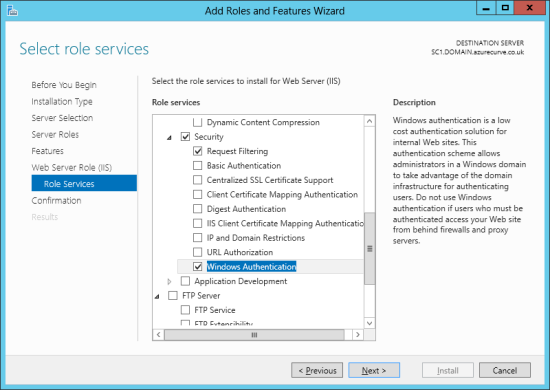
Scroll down the list, expand Security and mark Windows Authentication
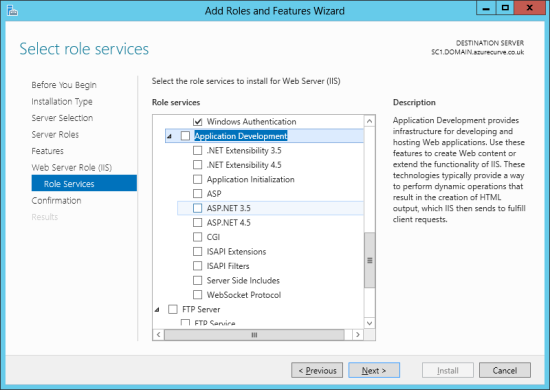
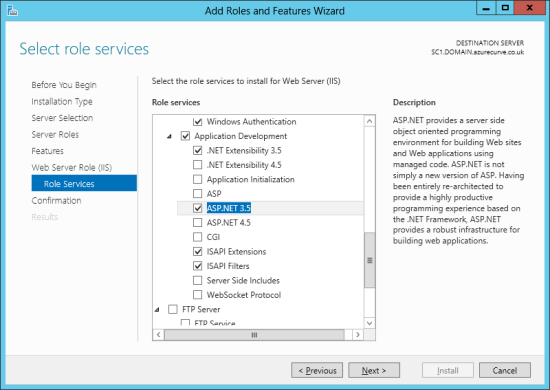
Expand Application Development and mark ASP.NET 3.5;
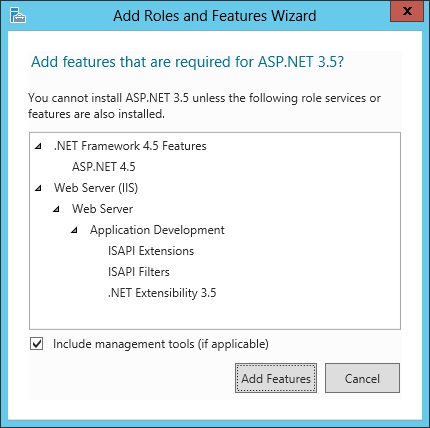
A list of the features required for ASP.NET 3.5 will be displayed. To proceed, clck Add Features:
 caption
Click Next to proceed:
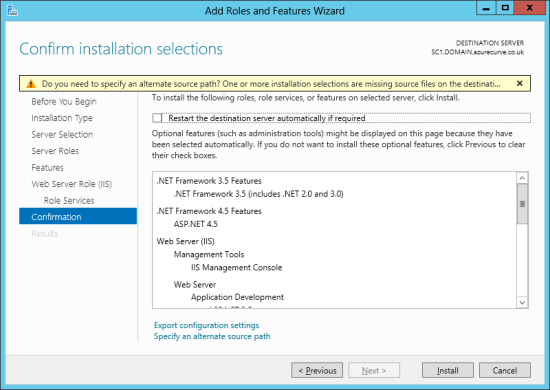
In the confirmation step, check your selections to ensure the relevant roles and features have been marked.
If your server is not connected to the Internet you will need to specify an alternative source path to be able to install the ASP.NET 3.5 feature. I blogged about how to do this back in June last year.
After confirming the roles and features to install, click the Install button:
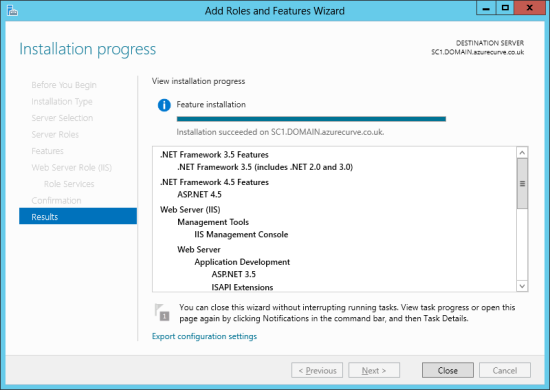
The installation may take some time to run through depending on the speed of your server and Internet connection. In Windows Server 2012 theAdd Roles and Features Wizard can be closed while the installation proceeds, but if you keep it open you will see the following confirmation once the install has completed:
Click to show/hide the Microsoft Dynamics GP 2013 SP2 Web Client Scale-Out Deployment Series Index
What should we write about next?
If there is a topic which fits the typical ones of this site, which you would like to see me write about, please use the form, below, to submit your idea.




3 thoughts on “Microsoft Dynamics GP 2013 SP2 Web Client Scale-Out Deployment: Installing IIS On Session Control Server”